
We go through a lot of fruit here at our Bed and Breakfast, from strawberries and blueberries on the side of our (soon to be) world famous French toast, to just having a bowl out at all times for guests to enjoy. Since we try to be as self-sustaining as possible, we are taking steps this spring to have some fresh, home-grown fruit this summer. We have some blueberry plants that will be planted in the coming weeks, and we are experimenting with growing our own strawberries using vertical planters.
With all the veggies, flowers and fruits that we have planned for the garden this year there isn't going to be a lot of extra space left over. We already have to find a different spot outside of the garden for a few odds and ends like butternut squash and corn that need a little more room. We were determined though, to find space for strawberries because we love them! With these space restrictions we started looking at vertical planters. After doing some research, we discovered that strawberries grow pretty well in hydroponic systems. Since we typically grow lettuce and other odds and ends through the winter inside hydroponically, we figured we'd give it a shot.
After some on-the-fly engineering and design, we came up with the towers you see below. I'm mostly happy with the way they turned out but next year there are a few things I’ll change - which I’ll get to in a minute.
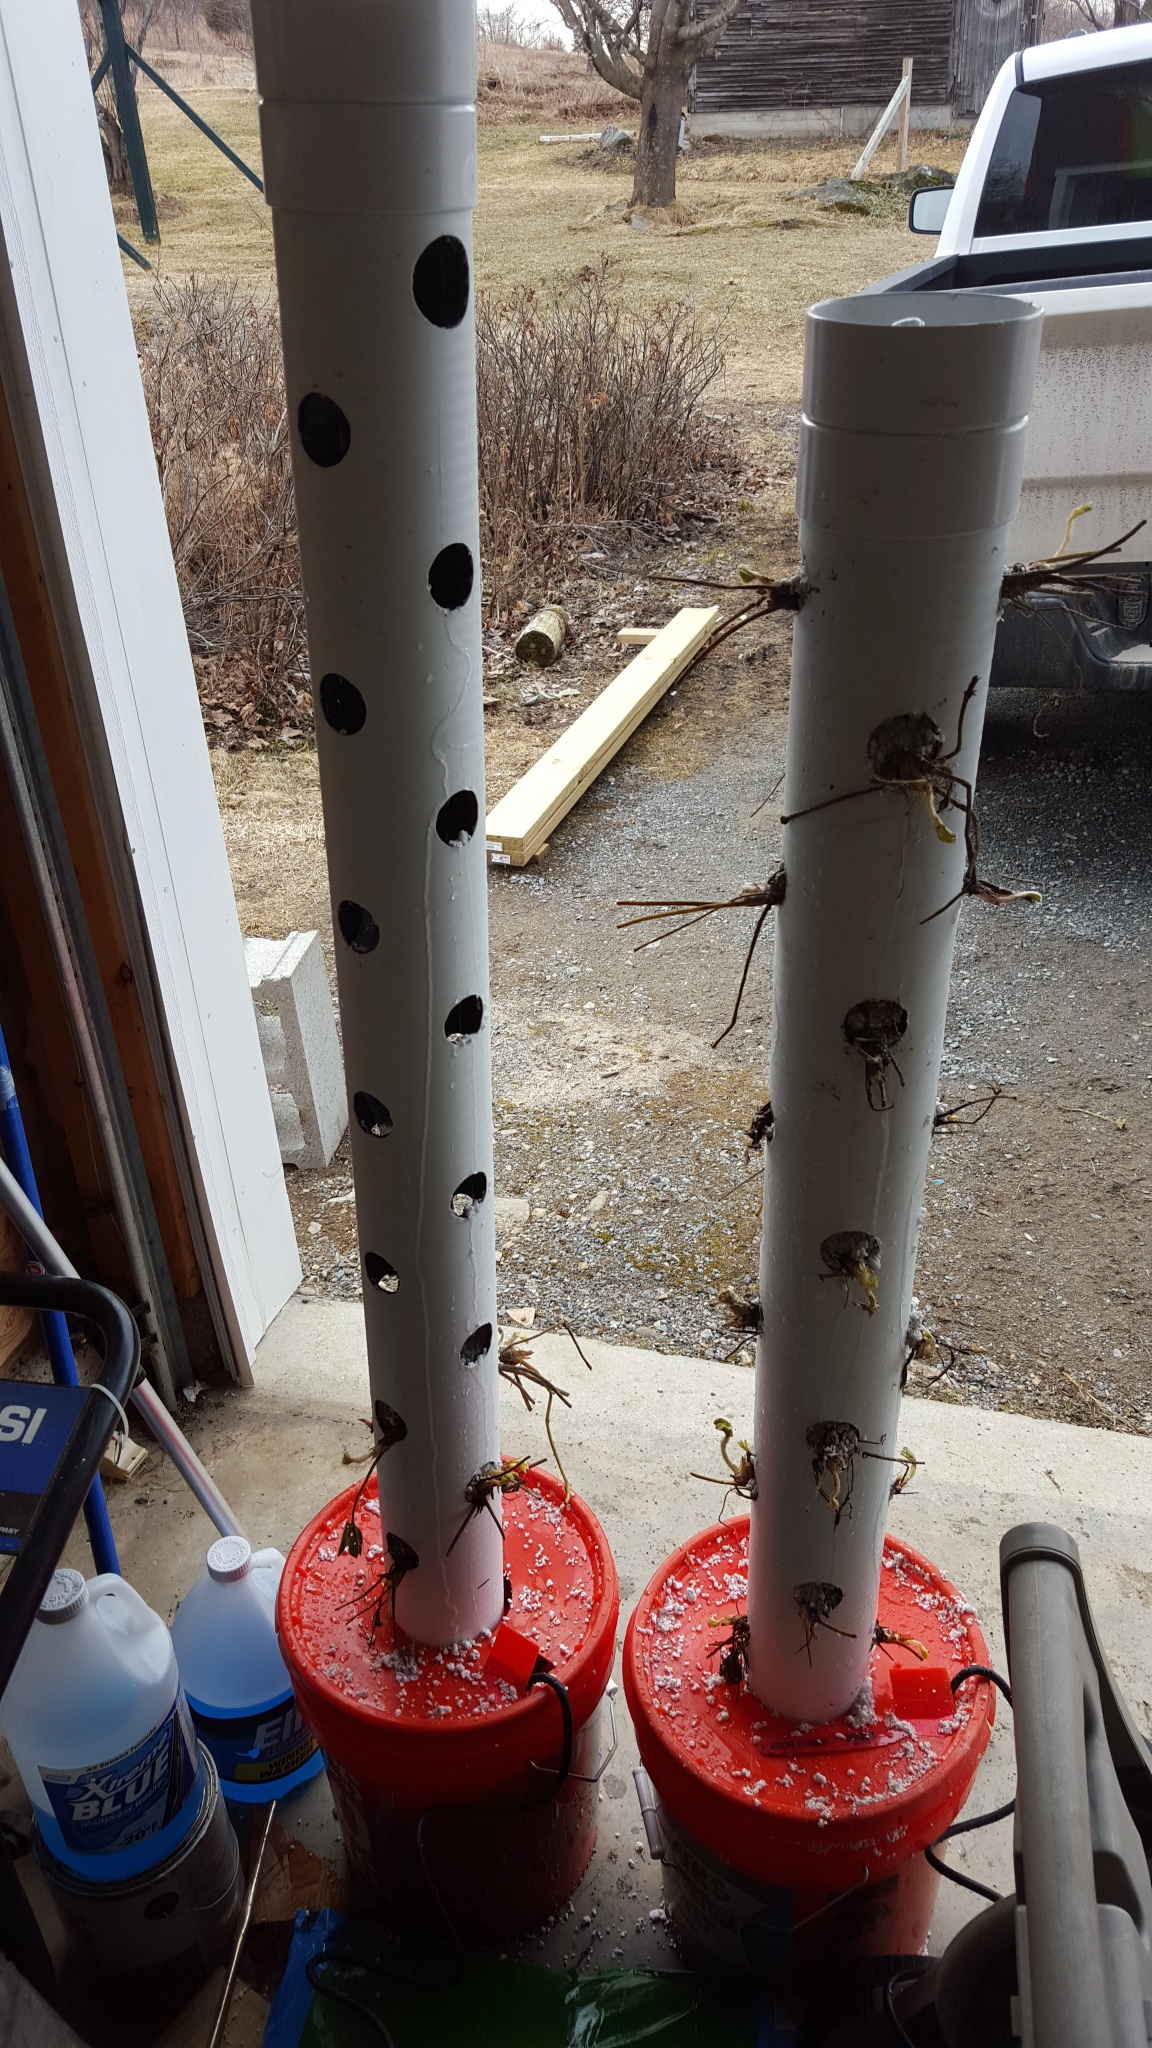
DIY Vertical Strawberry Towers
To build them, we took a 4 inch PVC drain pipe and cut it in half, then drilled circular holes large enough for the strawberry root to fit though, about an inch across, in four columns up the side of the pipe in a staggered pattern. Be sure to measure out where the lid will sit once the pipe is seated in the bucket, and stop drilling your holes just above that. Then below that "lid line" we drilled a series of smaller holes down the pipe to allow water to flow back into the bucket. The bottom of the pipe is capped with a 4" cap and screwed into the pipe, so that when the season is over we can pull the whole thing out of the bucket without everything coming out the bottom!
Now to the water pump. The whole premise of this system is that water is pumped to the top, and allowed to trickle down through the pipes, hitting each root as it flows down the tower. You need a good pump – I suggest a Baby Bear pump. Not too strong, not too weak, but just right. You'll need your pump to be able to push a column of water up at least 4 feet (the height of the tower) but you don't want it so strong that it overwhelms the system and overflows. We went with a 400 gallon per hour pump that claimed 300 gallons per hour with a 4 foot lift. After running the system it seems a bit less than that which is fine.
You've got a few options here. You could plumb your two "tower buckets" together and have a third bucket as a reservoir with the pump in it, and then run your water line to a T fitting then to the tops of each tower; or opt for less clutter and get two pumps, placing one in each bucket, and run the waterline inside the pipes. This is the method we selected. After determining the length of hose needed to reach the top, we drilled a hole below the lid line that was as big as the waterline and fished the waterline through the hole and up the pipe. We then connected it to the pump in the bucket, put some water in it, and made sure we had a good flow rate to the top.

The Pump & Water System
To keep the pipe upright, we filled the bucket with a bag of crushed rock. Make sure to wash the rock first to keep dirt out of the system. Also be sure to fill the inside of the pipe with rock up to the lid line. The reason for this is we used perlite as our growing medium. Perlite floats and as such, it would be almost impossible to get a good base of perlite under the water line. Once you get above the water line with rock, start adding the perlite. Once you hit an opening, add the strawberry plants. Keep adding perlite and plants until you reach the top of the tower.
For the top we took two 4" PCV caps and used PVC cement to glue them together. We then drilled a hole in the middle the exact diameter of the waterline and pushed the waterline through. We put the cap on the pipe and turned the pump on. The upside down cap starts filling with water and at that point just grab a small drill bit and go to town. Drill enough holes so the cap doesn't fill up and overflow.

Drainage holes for the water system.
There you have it! In theory the system will work but I’ll check back with you in a month or so and let you know how it did! Since water and perlite don't have much in the way of nutritional value we will need to start adding nutrients to the water soon. Oh, and as for the things I would do differently: next year I won’t be using perlite as a medium. It's messy, it gets everywhere when you are filling the tower, and water has a tendency to create little rivers in it and those rivers always come out the holes. Next year we will switch to a hydroton medium. There’s always something to learn when you’re active on the farm!
- Luke McCarthy